Make sure you have a strong internet connection.
Make sure there are no other devices connected to the network and no other applications running on your computer during your presentation. Use a hardline connection if Wi-Fi is not sufficient.Set up in a quiet space.
Your audience does not want to see or hear your colleagues, family, or pets in the background.- Be sure to let people around you know that you are recording an important presentation so they will know to keep their noise level down. That will also help you to stay focused with no distractions.
Silence ALL your nearby devices, disable notifications, and remove any background noise
From an attendee perspective, it is distracting to hear every ping and text that you receive.- Turn off fans and close the door and windows.
- If possible, use headphones with an attached microphone when presenting.
Choose a plain backdrop.
Remember, you want your audience to focus on you and the material you are presenting, not what is behind you.- Keep your webcam at eye level or slightly above it, and make sure you and your backdrop look professional and inviting with a simple and uncluttered background.
- Make sure you enable HD settings on your camera.
- Wear a top that is a plain, solid color but be cognisant that depending on the colour of your background, bright white or black may cause you to look like a “blob” on camera.

Front lighting on camera is key!
Your audience wants to see your face!- For the best video quality, make sure the lighting is in front of you and there are no windows behind you.
- You may also wish to invest in a low-cost desktop video light if you do not have a source of natural light in your office space.

For virtual presentations, less is almost always the best route. Write a script you can follow while presenting, and practice couple of times so that you sound natural and fluid. Your presentation should be no longer than 8 minutes.
Presentation Slides
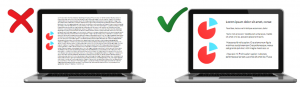
Your presentation slides are there to help drive your message, not BE the message.- Try to keep your slides short and to the point. Use your slides as a talking point or highlight, rather than reflecting your presentation word for word.
Have a visually engaging presentation.
Make use of graphics and photos to illustrate your message.- Limit transitions and animations as they can be distracting and may cause a lag when streaming or broadcasting.
- A good rule of thumb is to spend no longer than 2 minutes per slide.
Your presentation may appear smaller to participants
- The participants of a virtual presentation may also choose to see panels for discussion and questions, or have notes tabs open, so keep this in mind when adding small images or text onto a presentation – they may not be viewing a full screen.
- Do not include everything you COULD say, just keep the content that you MUST say.
Make sure you know how much time you have for your presentation!
- Your presentation time must not exceed the allocated time. There is a hard deadline for each session, so please respect your time so we can accommodate all videos.
Try to avoid appearing stiff and mechanical.
- A good tip is to consider presenting while standing. You will feel more energized and be able to breathe better. If you do decide to be seated, sit upright and be close to the camera.
- Ensure that mostly your face and shoulders are visible. Your attendees will be more engaged and interested in what you have to say.
Whether live or virtual, presenting is a relationship between you and your audience.
- Do not let the camera and computer be a barrier to your audience. Your audience cares about what you have to say, so speak to them like they are in the same room. Do not disengage when you are alone and speaking towards a web cam.
- Look into the camera when talking. Direct eye contact into the camera while speaking gives attendees the impression you are looking at them, rather than off-screen.
- Rehearse with a live or virtual audience. Presenting to family and colleagues is good way to practice and they will give you feedback and pointers that may help.
Practice for a successful delivery.
- Test all your technical settings each time you login (camera, device, video and audio, and internet connection)
- Test your physical settings – the best place in your home or office, quiet space, lighting
- Prepare for your presentation by writing a script, so your delivery sounds natural
- Rehearse with a live or virtual audience or record a demo of yourself giving a presentation so that you can see what your audience will be viewing.
- Practicing will help you feel comfortable and will give you extra confidence!
Recording a voice over with Power Point
Recording Audio:- If you can, please use the Power Point template provided. But if you need to use slide template from your organization, we invite you to add XChange logo. You can find different versions here.
- Don’t forget to participate in dancing monkeys scavenger hunt
- From the Power Point Slide Show tab, select the Record Slide Show drop-down arrow, then choose either Start Recording from Beginning or Start Recording from Current Slide.
- A dialog box will appear, select the desired options, then click Start Recording.
- Your presentation will appear in full-screen view. Perform your slide show, make sure to speak clearly into the microphone.
- When you are ready to move to the next slide, click the Next button on the Recording toolbar.
- When you reach the end of the presentation, PowerPoint will close the full-view screen.
- Your slide timings and narration are now part of your presentation. The slides with narration will be marked with a speaker icon in the bottom-right corner.
- Rehearsing timings can be useful if you want to set up a presentation to play at a certain speed without having to click through the slides yourself.
- Go to Slide Show tab, then click the Rehearse Timings command.
- Practice presenting your slide show. When you are ready to move to the next slide, click the “next” button on the recording toolbar in the upper left corner.
- When you reach the end of the show, a dialog box will appear with the total time of your presentation. If you are satisfied with your timings, click Yes.
- If you need more than one attempt to get the timings just right, the Recording toolbar can be used to take a break or start over on a slide.
Recording with video in Zoom
- Click here to watch a useful video or follow the steps below
- Log in to your Zoom account (free to join), and select “new meeting”
- You should see your webcam on the screen indicating the meeting has begun. You can choose to turn the video feature on/off by selecting the video icon at the bottom of the screen.
- To set up your microphone, click on the chevron next to the microphone icon. From the pop-up list that appears, select the microphone you wish to use. Test your audio to ensure the microphone icon is filling with some green when you speak.
- When recording in Zoom please be sure that “HD enabled” is selected. This will give you the most optimal video recording. You can find this in the Video Settings tab. If your surroundings are in low light, adjust your Video Settings tab as well.
- Before beginning your Zoom recording, open your presentation (PowerPoint, Prezi, or other presentation software) and set it to speaker/presentation mode.
- Return to your Zoom meeting screen and click on “share screen”. In the dialog window that appears, select your presentation, and click “share screen”.
- Once your presentation is being shared on the screen, expand to full screen, and you will be able to advance slides with your mouse, space bar or arrows on your keyboard
- When the presentation expands to a full screen, your video screen will be reduced to a small window. You can reposition this window to wherever you would like it to appear throughout the presentation. You can also change the size of your video screen from small to large. If you choose to use the larger size video screen, be sure that you have designed your slides accordingly. *Remember, the webcam video will appear in the final recording.
- Select the “Record” button at the bottom of the screen and begin your presentation.
- If you need to take a break while recording, select the Pause button. When you are ready to continue resume by pressing Play for a continuous video. When you are finished your recording, press stop and end the meeting.
- The recording will automatically save to your computer, locate the file and rename using the provided guidelines.
☑ Is your audio loud enough?
☑ Are your slides complementary to your presentation and can be read clearly?
☑ Have you used the template slide
☑ Can you hear any background noise (TV, lawnmower, other people talking) that interferes with your presentation audio?
☑ Is your video showing your face clearly and in good lighting?
☑ Is your recording no longer than 8 minutes?
- The videos will not be edited. Send the file complete and ready – as you wish for it to be played.
- Save the file output at minimum 720p (medium), bitrate up to 2mbps.
- Rename your file as the following: XChange_first 5 words of your presentation title (e.g., XChange _This is the title_Xmonkeys).
- The last fragment relates to number of monkeys. If you are not including any monkeys, you can skip that.
- Save your presentation under any of the following: MP4, MOV, or AVI. MP4 is preferred for our conference platform.
- All videos uploaded will be converted to square pixels. Regardless of format, all videos will be displayed at the correct aspect ratio.
Please upload your video to this link by May 15, 2021
If you are experiencing problems with this link, please use this alternative link to upload.